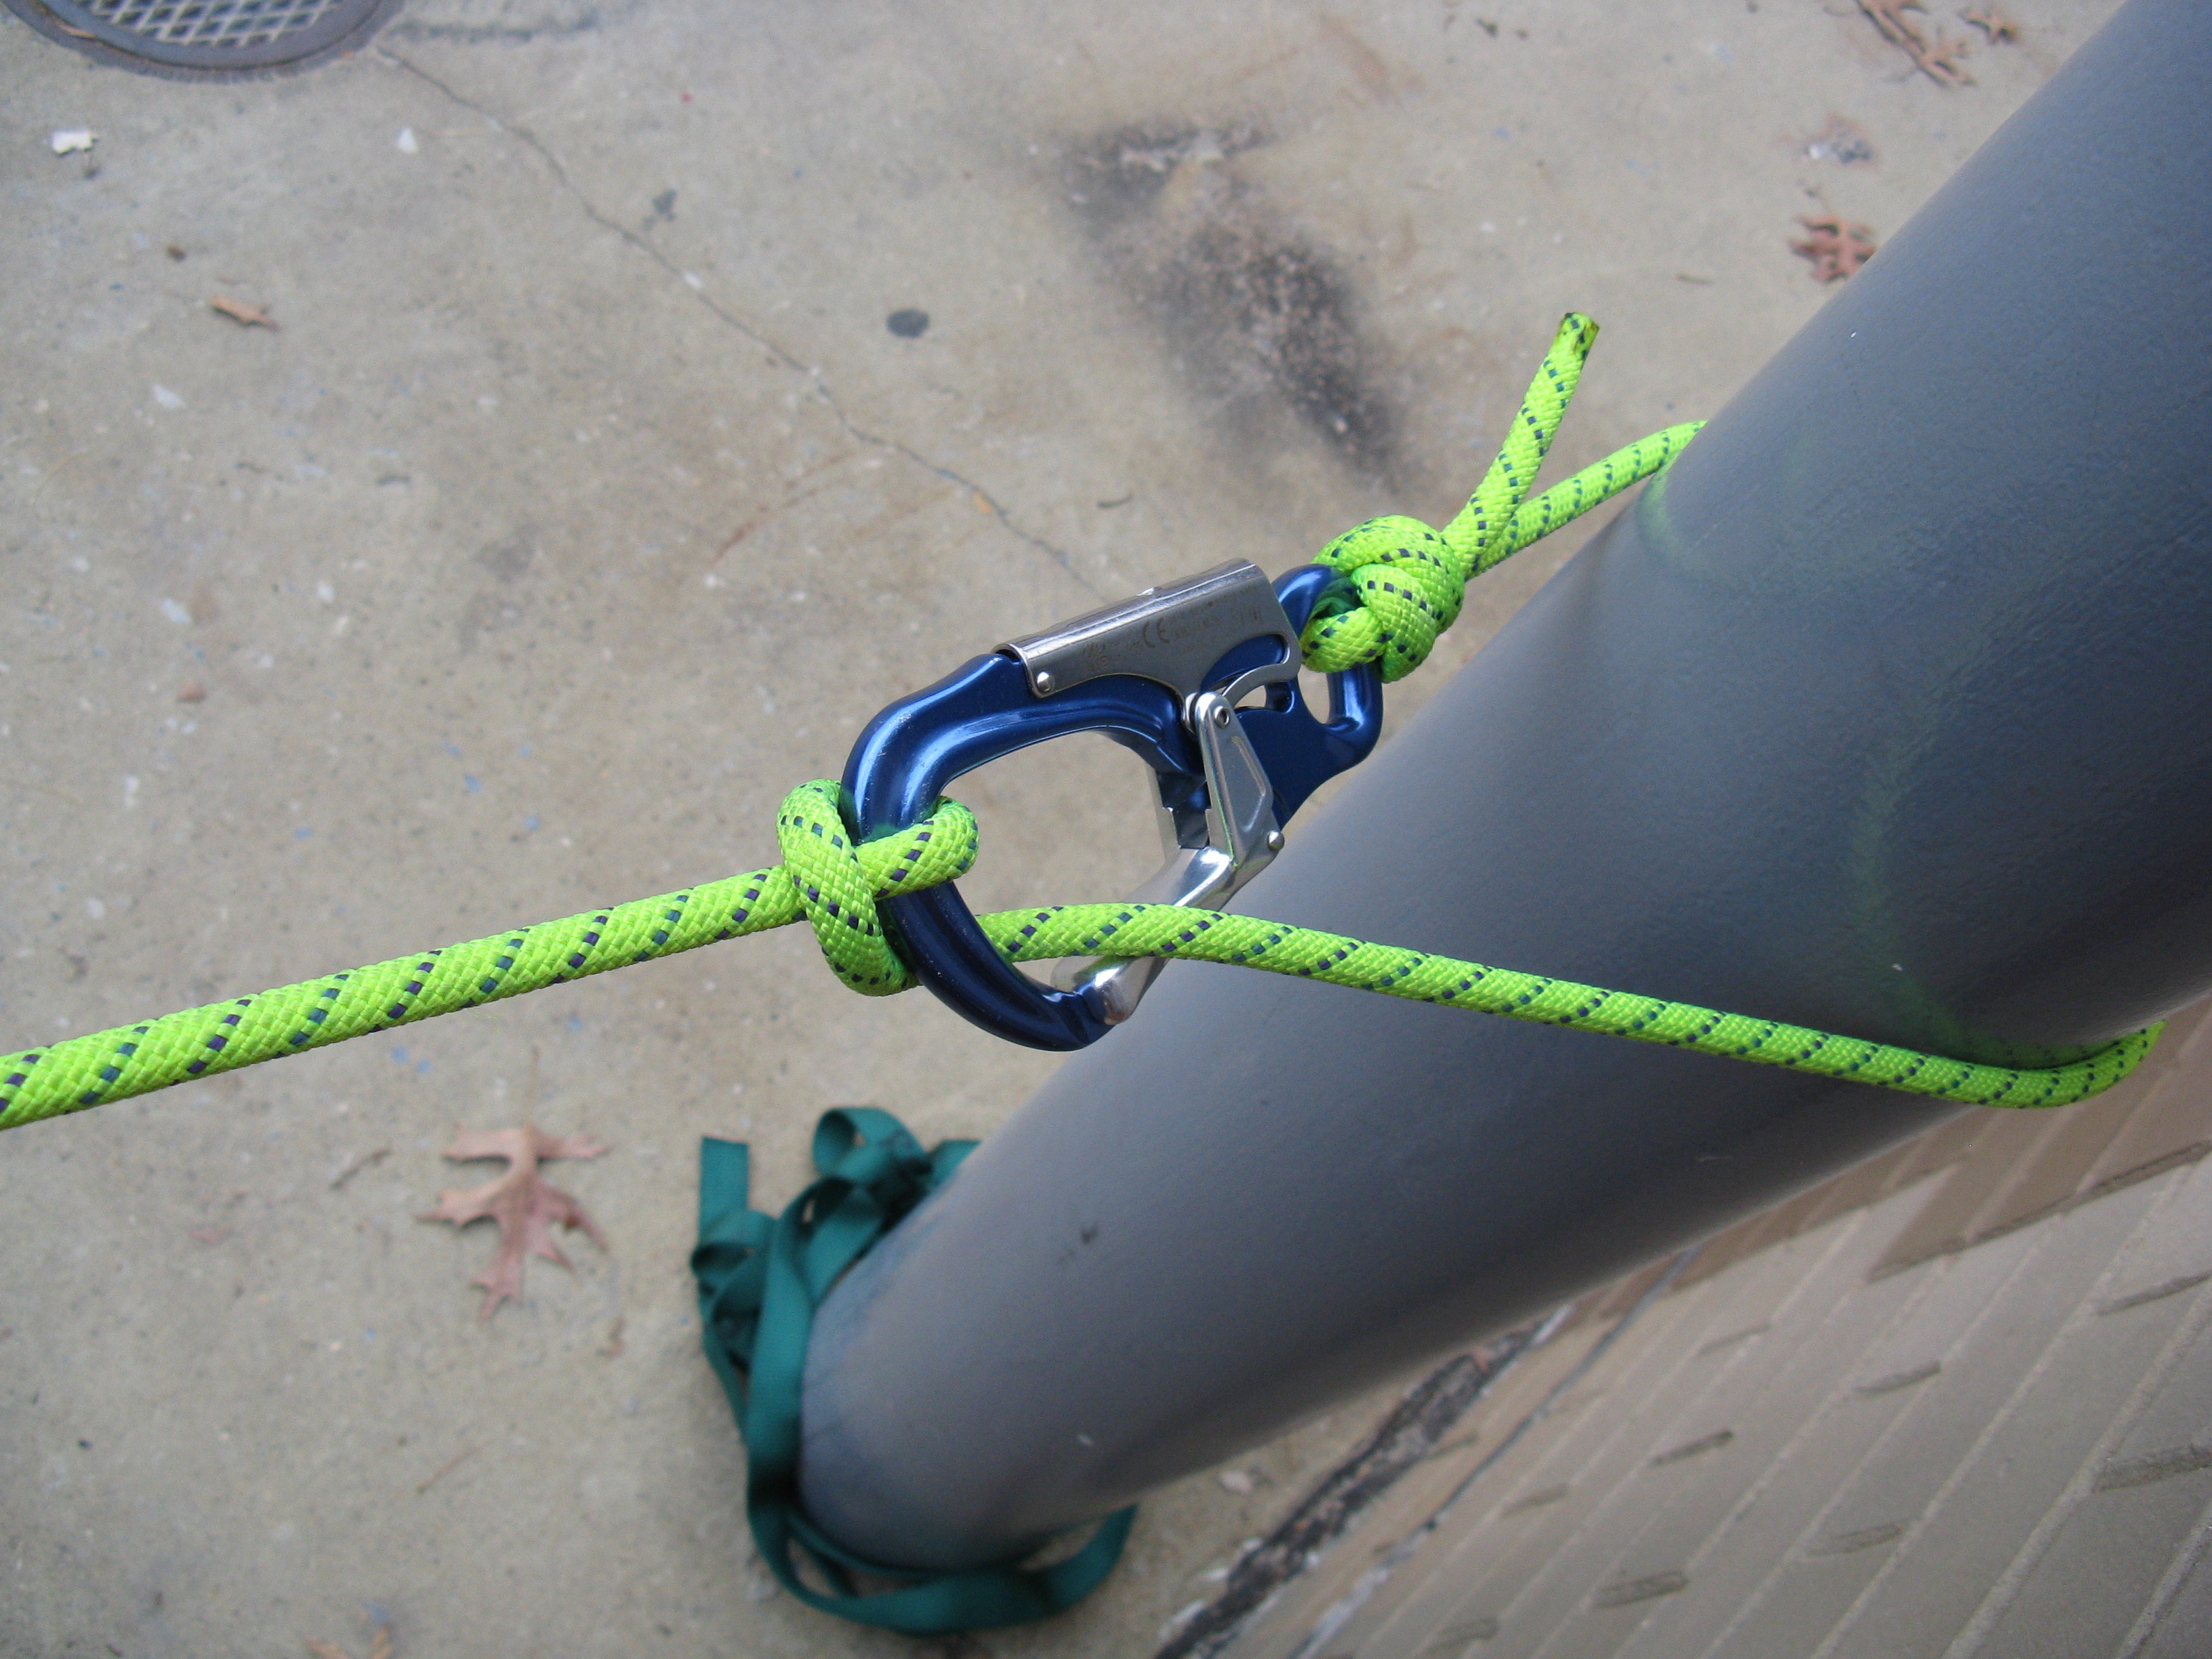
There’s a ton of different ways to attach your travel restriction to your anchor; some right, some wrong. One of the easiest ways to make it happen is also one of the worst. Simply wrapping you carabiner and rope around the anchor and clipping it back to itself is not an entirely uncommon sight.
Take a look at the videos below that were taken by Richard Delaney of Rope Lab and Rope Test Lab on Facebook. They show what can happen if you actually took a fall on this type of tie off. This type of demonstration should be enough proof for the doubters that you should actually pay attention to how you tie off. It’s obviously an issue of training to make sure it always gets done correctly. Sometimes it can be the littlest attention to details that can have the biggest effect.
The wrong way:
Better ways to tie off are to use either a clove hitch or Italian (Munter) hitch:
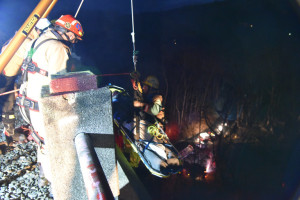
There was a rescue from the Paulinskill Viaduct in New Jersey earlier this week. A young female injured her ankle while apparently climbing around under the viaduct, a popular place to do some urban exploring. The viaduct is listed a seeing 125′ above the creek below.
Reading the article linked below and looking at some of the pictures, a few things jumped out at me. The first was that just because you can access somebody on foot, in this case climbing down the manhole, doesn’t mean it’s the easiest way to remove them. It looks like the rescuers entered down the manhole on foot and came up the side of the viaduct as an attendant on the side of the stokes basket.
A couple of things I noticed: Great use of the tools at hand to construct a high directional. I do think, however, that it was leaned out a bit too far. If you watch the video in the link, you can see the difficulty in trying to bring the basket up and over the rail while the attendant is still attached. Not a huge difficulty, but probably frustrating.
Four quick thoughts on fixing that, from guy who wasn’t there and is Monday morning quarterbacking it. First, don’t have an attendant. There didn’t look to be many obstructions on the way up. Attendants are popular because it looks cool and we often times do it in training, but they are not needed as often as we put them on.
Second, have the attendant get on terra firma as soon as possible. This will cause the edge crew to only have to haul a single person load out of plumb and up over the rail. This means that the attendant needs to EASILY be able to move up and down the rope; either be great at ascending and descending quickly or use something like an AZTEK kit for the attendant’s line.
Third, don’t lean the bipod over so far. It’s nice to not have any rope touching the edge anywhere, but it makes it a tremendous pain in the butt to try and get back up over the edge because you are trying to pull a load a couple of feet in on a short rope. Difficult, to say the least.
Fourth, make gravity work for you. I’m not sure if it was possible or not, but why not just lower all the way to the ground? Have the Gator at the train the bottom and move them up to the ambulance on that, perhaps? Again, I wasn’t there, but options like this one should always be considered during the size up.
A department in Oregon was on the news for a rescue they accomplished when they rescued a kid who fell 50′ down a cliff while trying to retrieve a cell phone (thank goodness for job security). In the video footage win the link below, you can briefly see the setup they used during the actual rescue. The Fire Chief also took the opportunity of the news interview to have his guys using an Arizona Vortex at ground level for some good public education. Nicely done!
If you are interested in upping your game on how to use the Arizona Vortex, we still have a few spots available for our Oct. 19 and 20 Modern Technologies in Rope Rescue class. HERE
Thank you to everybody for all of the interest! After filling up all of the spots in our first class in record time, we opened up a second class right after the first one. That class has now filled, too! Keep an eye out on the website for our upcoming classes. We will most likely have the next one in March. You can sign up for our mailing list in the column on the righthand side of the web page.
After many months and many requests, we are once again offering open enrollment for our popular Modern Technologies in Rope Rescue class. Come join us in Lancaster, PA on Oct 17 and 18 to learn how much more efficient your rescues can be with a few pieces of modern gear and a whole lot of practical applications learned from real world experiences. Here is your chance to keep up on the latest equipment and trends in the rope rescue world.
After filling up the Oct 17, 18 class in record 5 days (!!!) we have decided to run a second class the following 2 days. The registration is currently open for the Oct 19, 20 class. The link at the bottom of this page will register you for the second class.
Topics this time around include:
Use of the AZTEK kit to pass knots, perform a pickoff, basket attending, and a whole lot more.
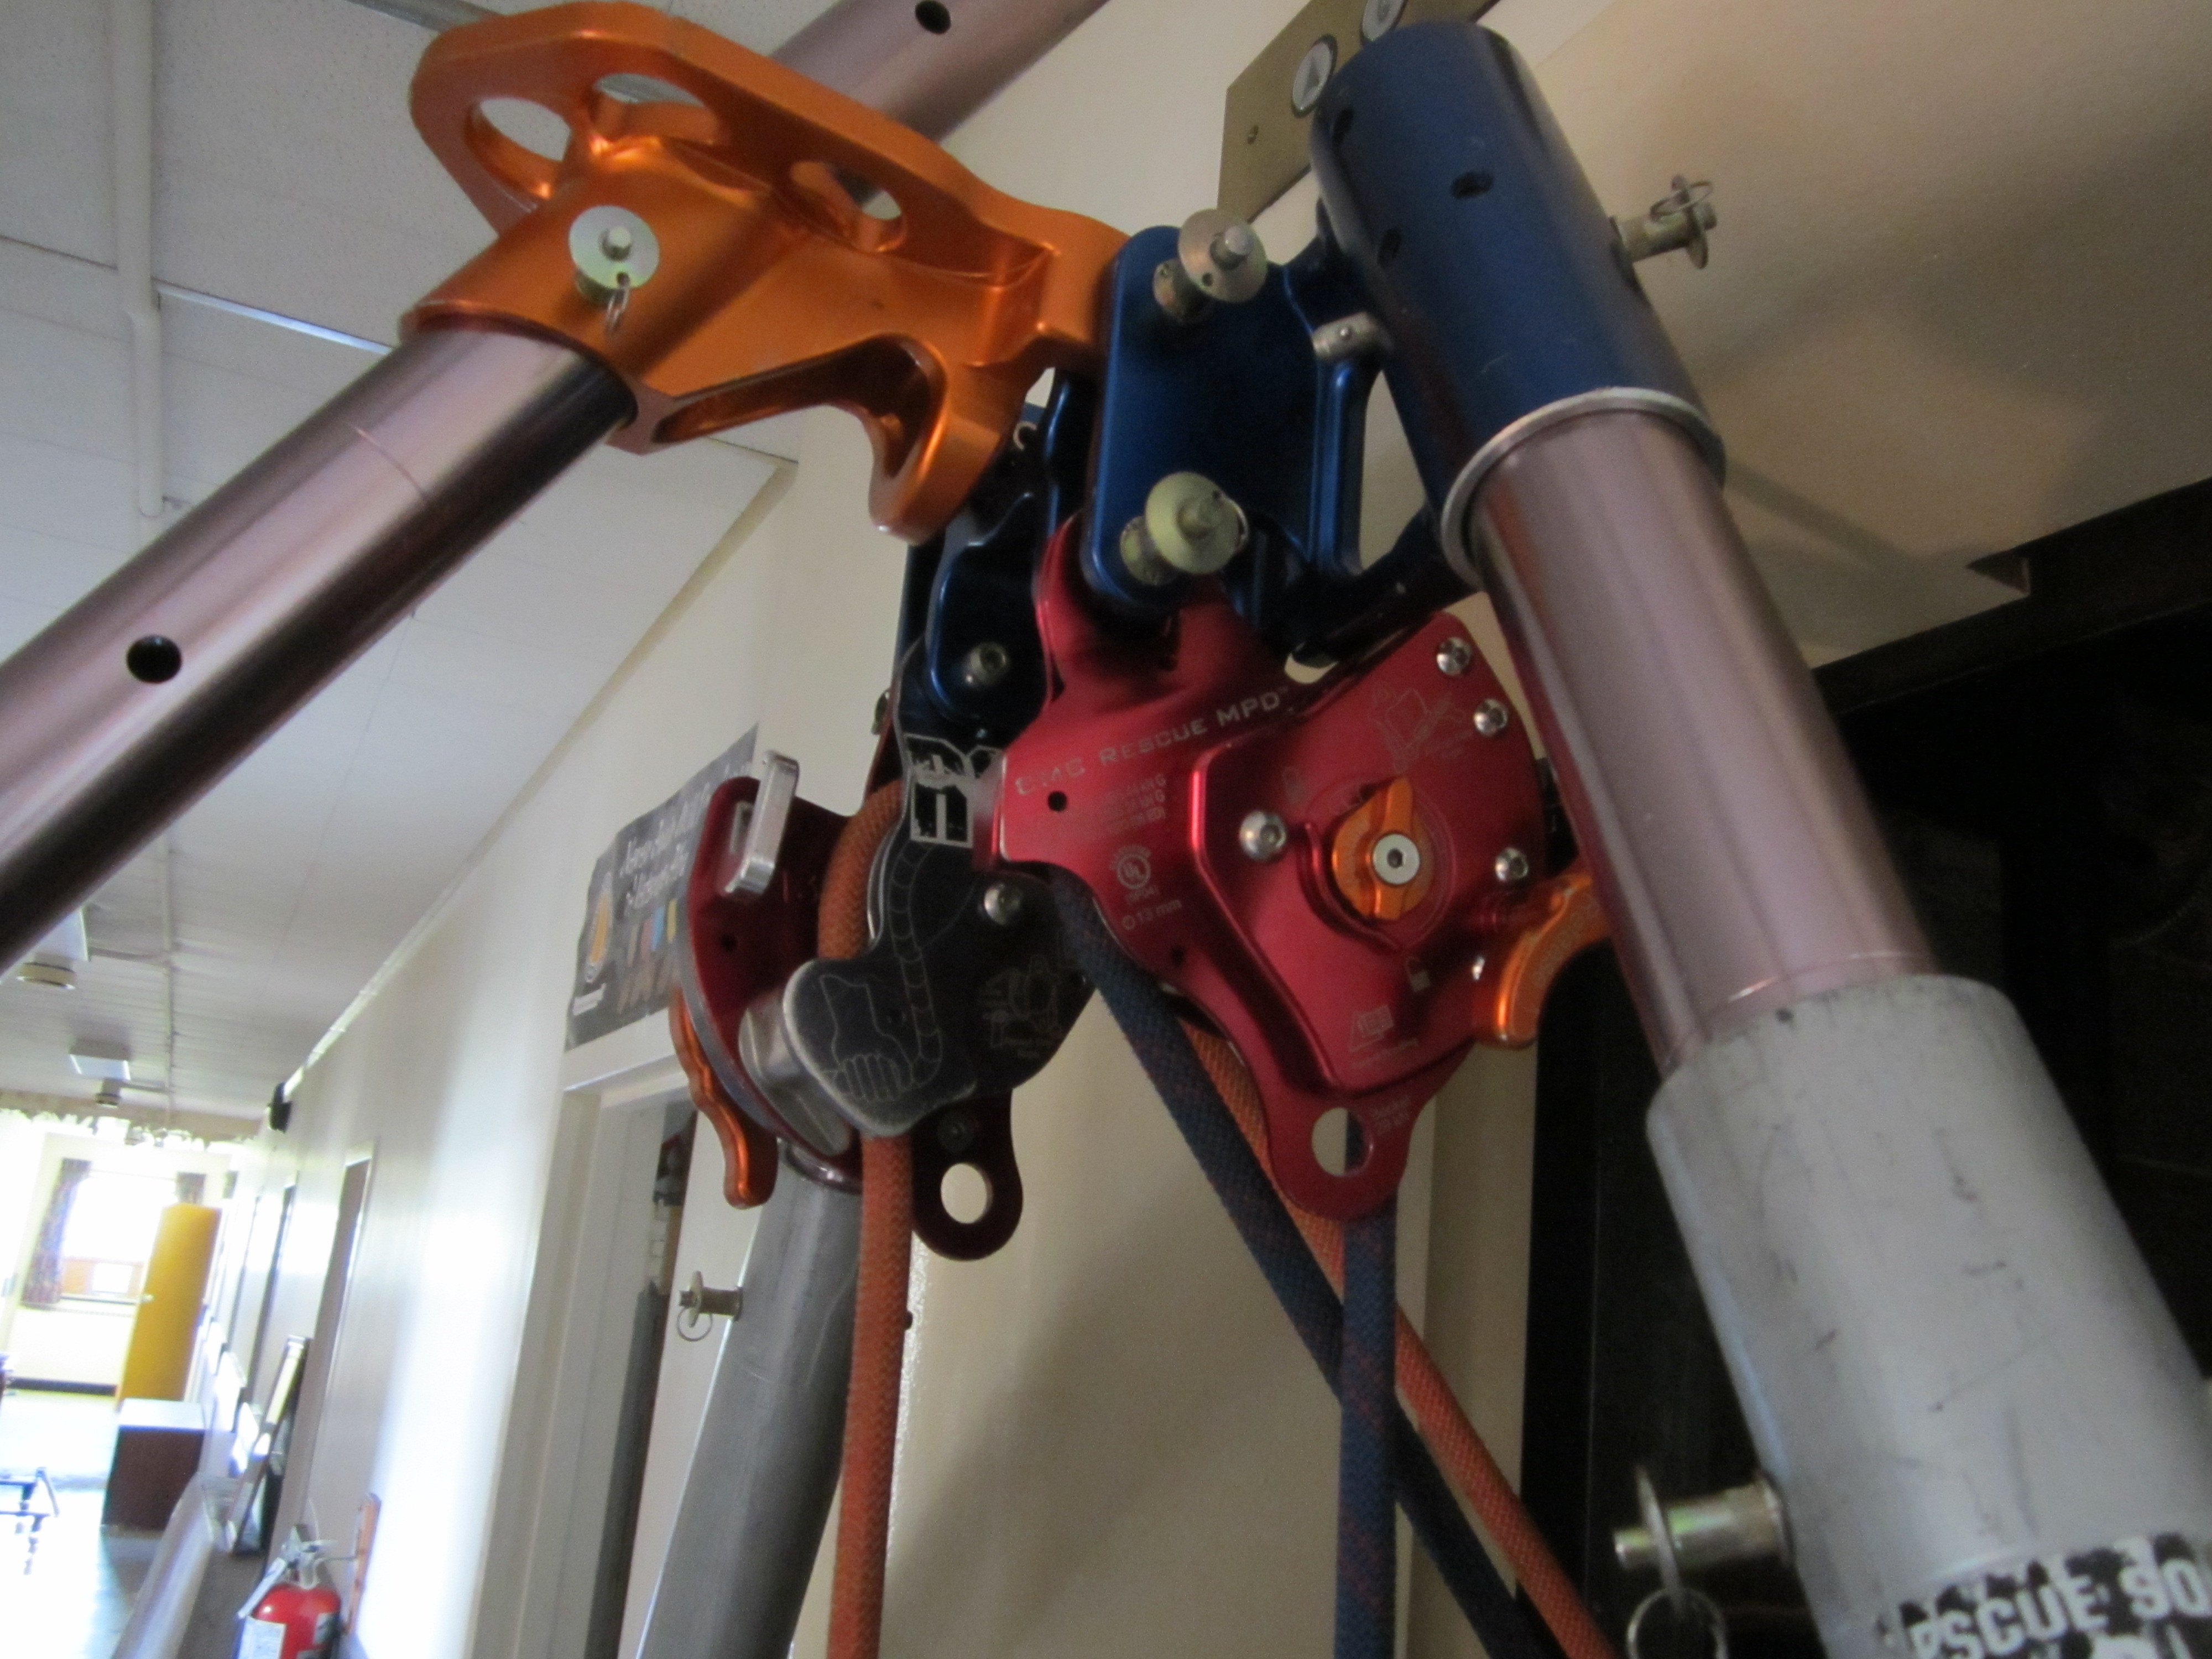
In depth discussion and use of the Two Tension Rope System utilizing the MPD.
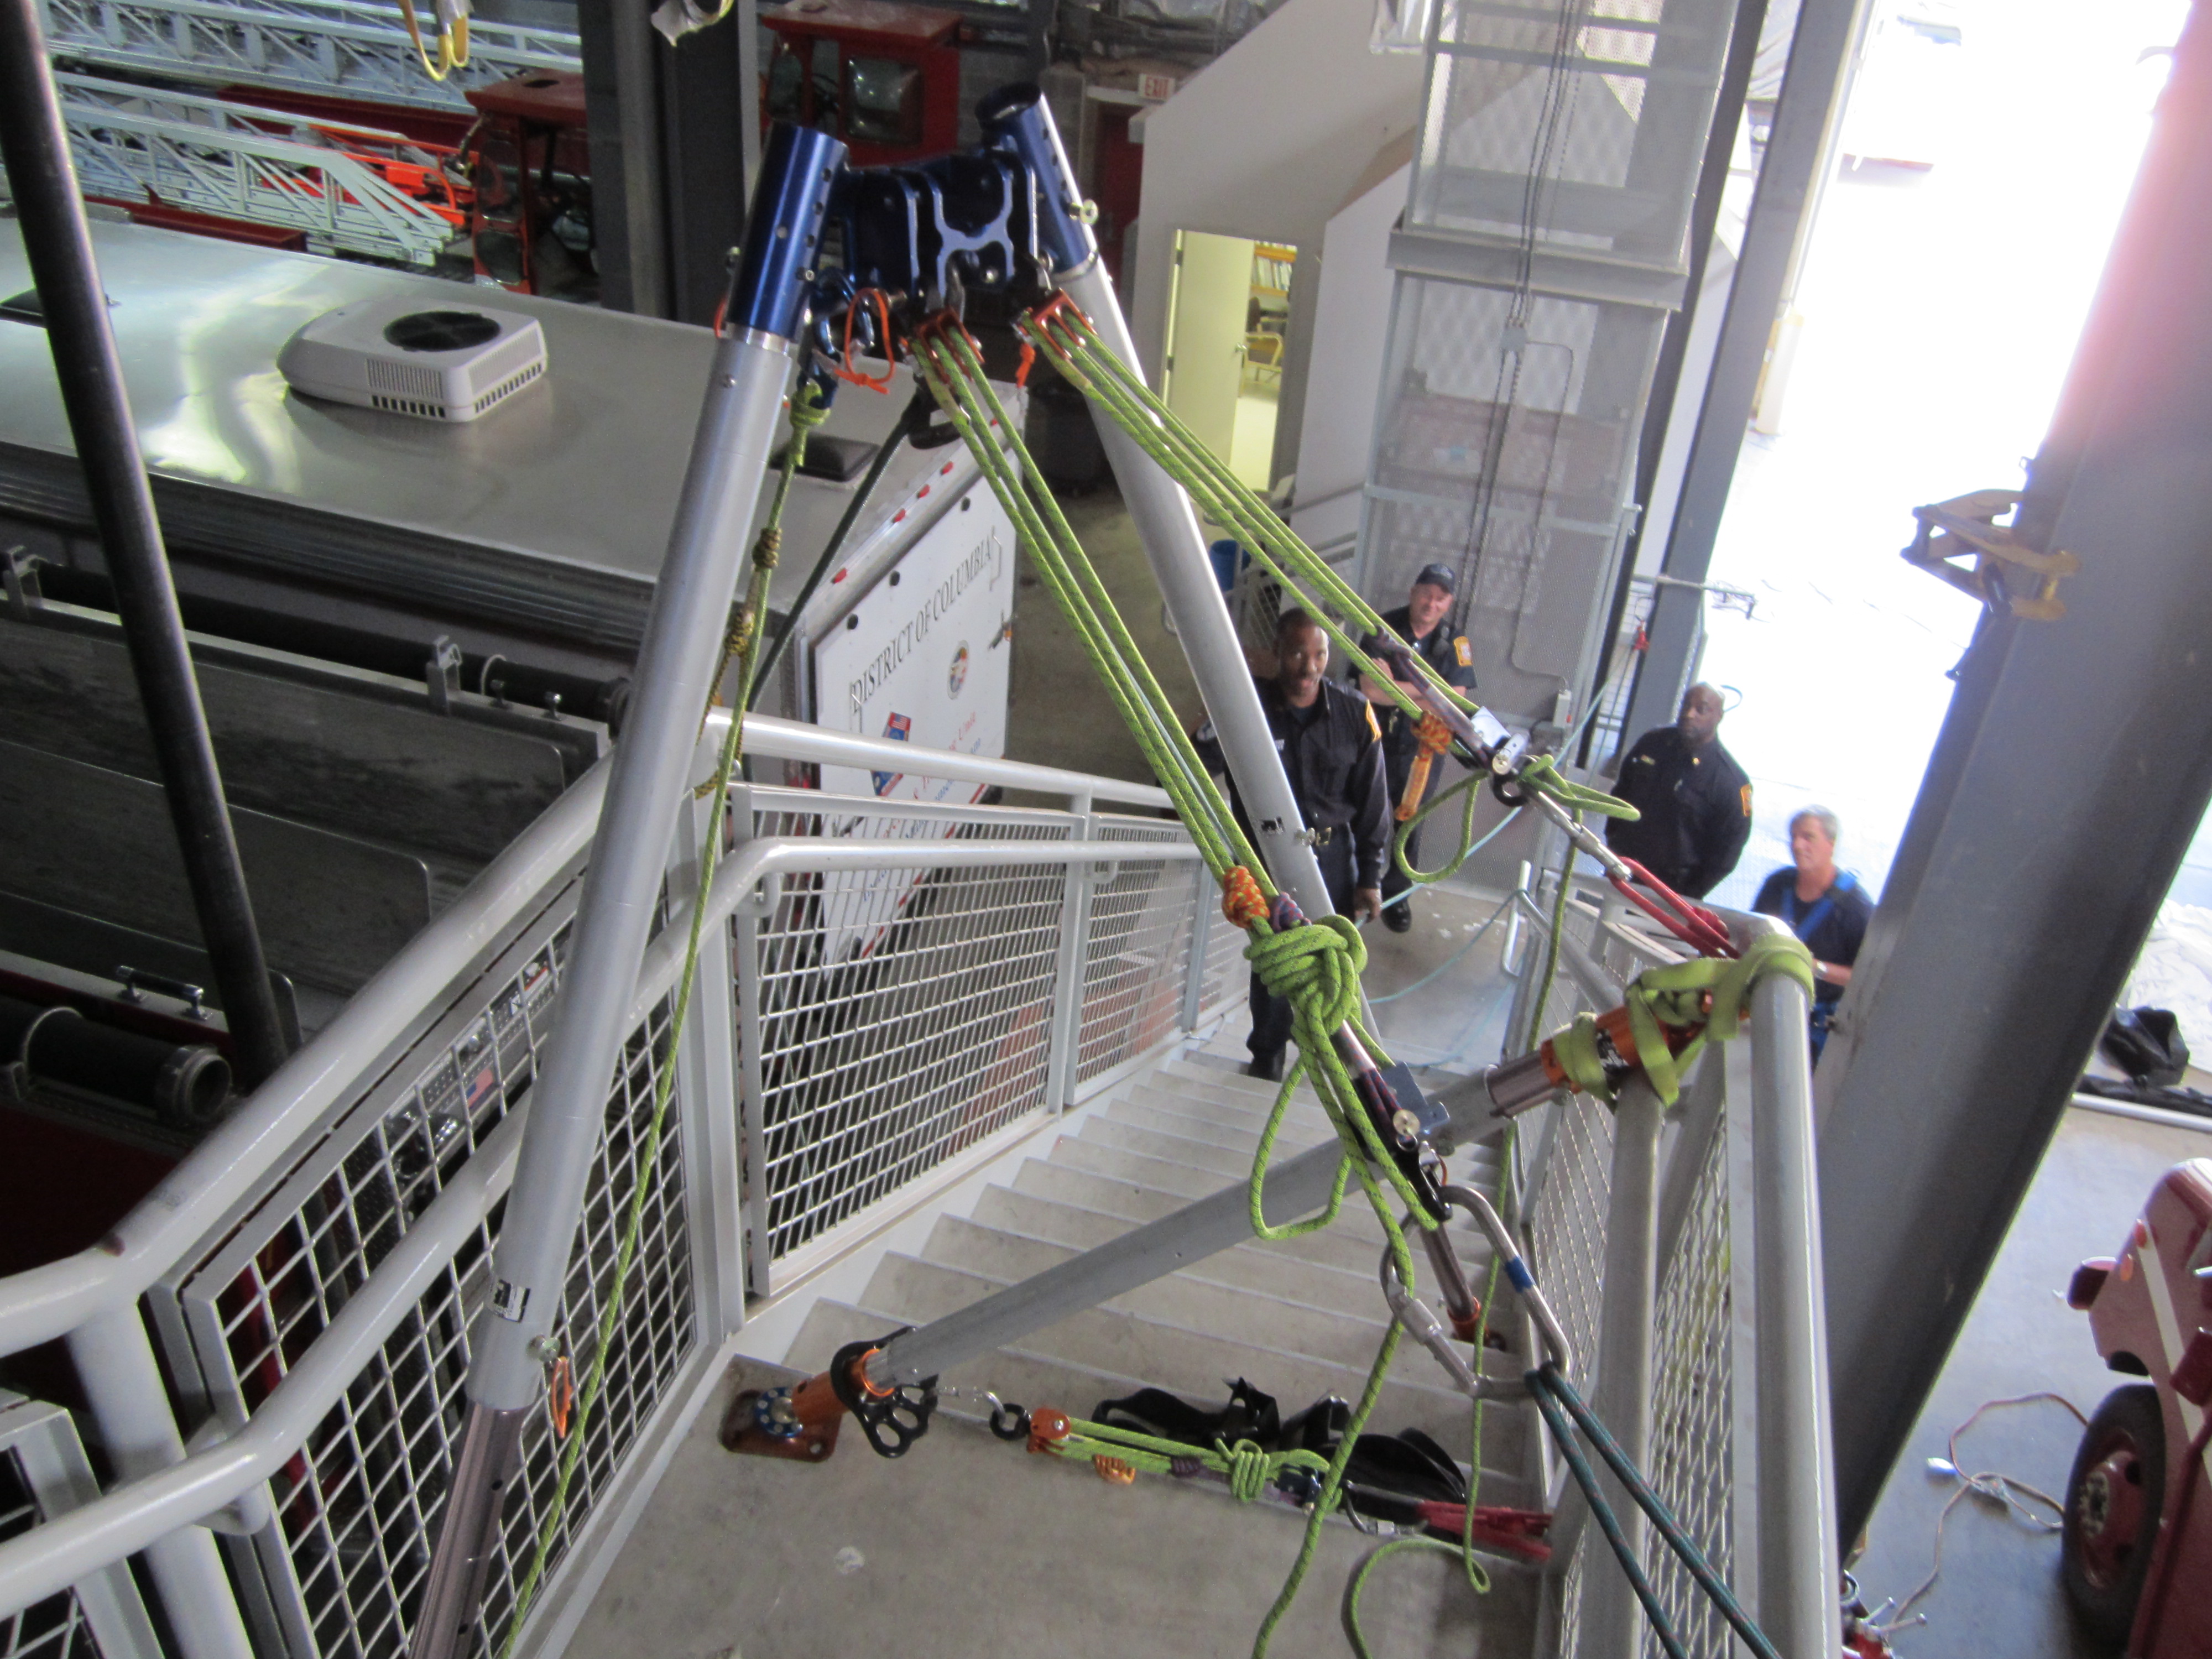
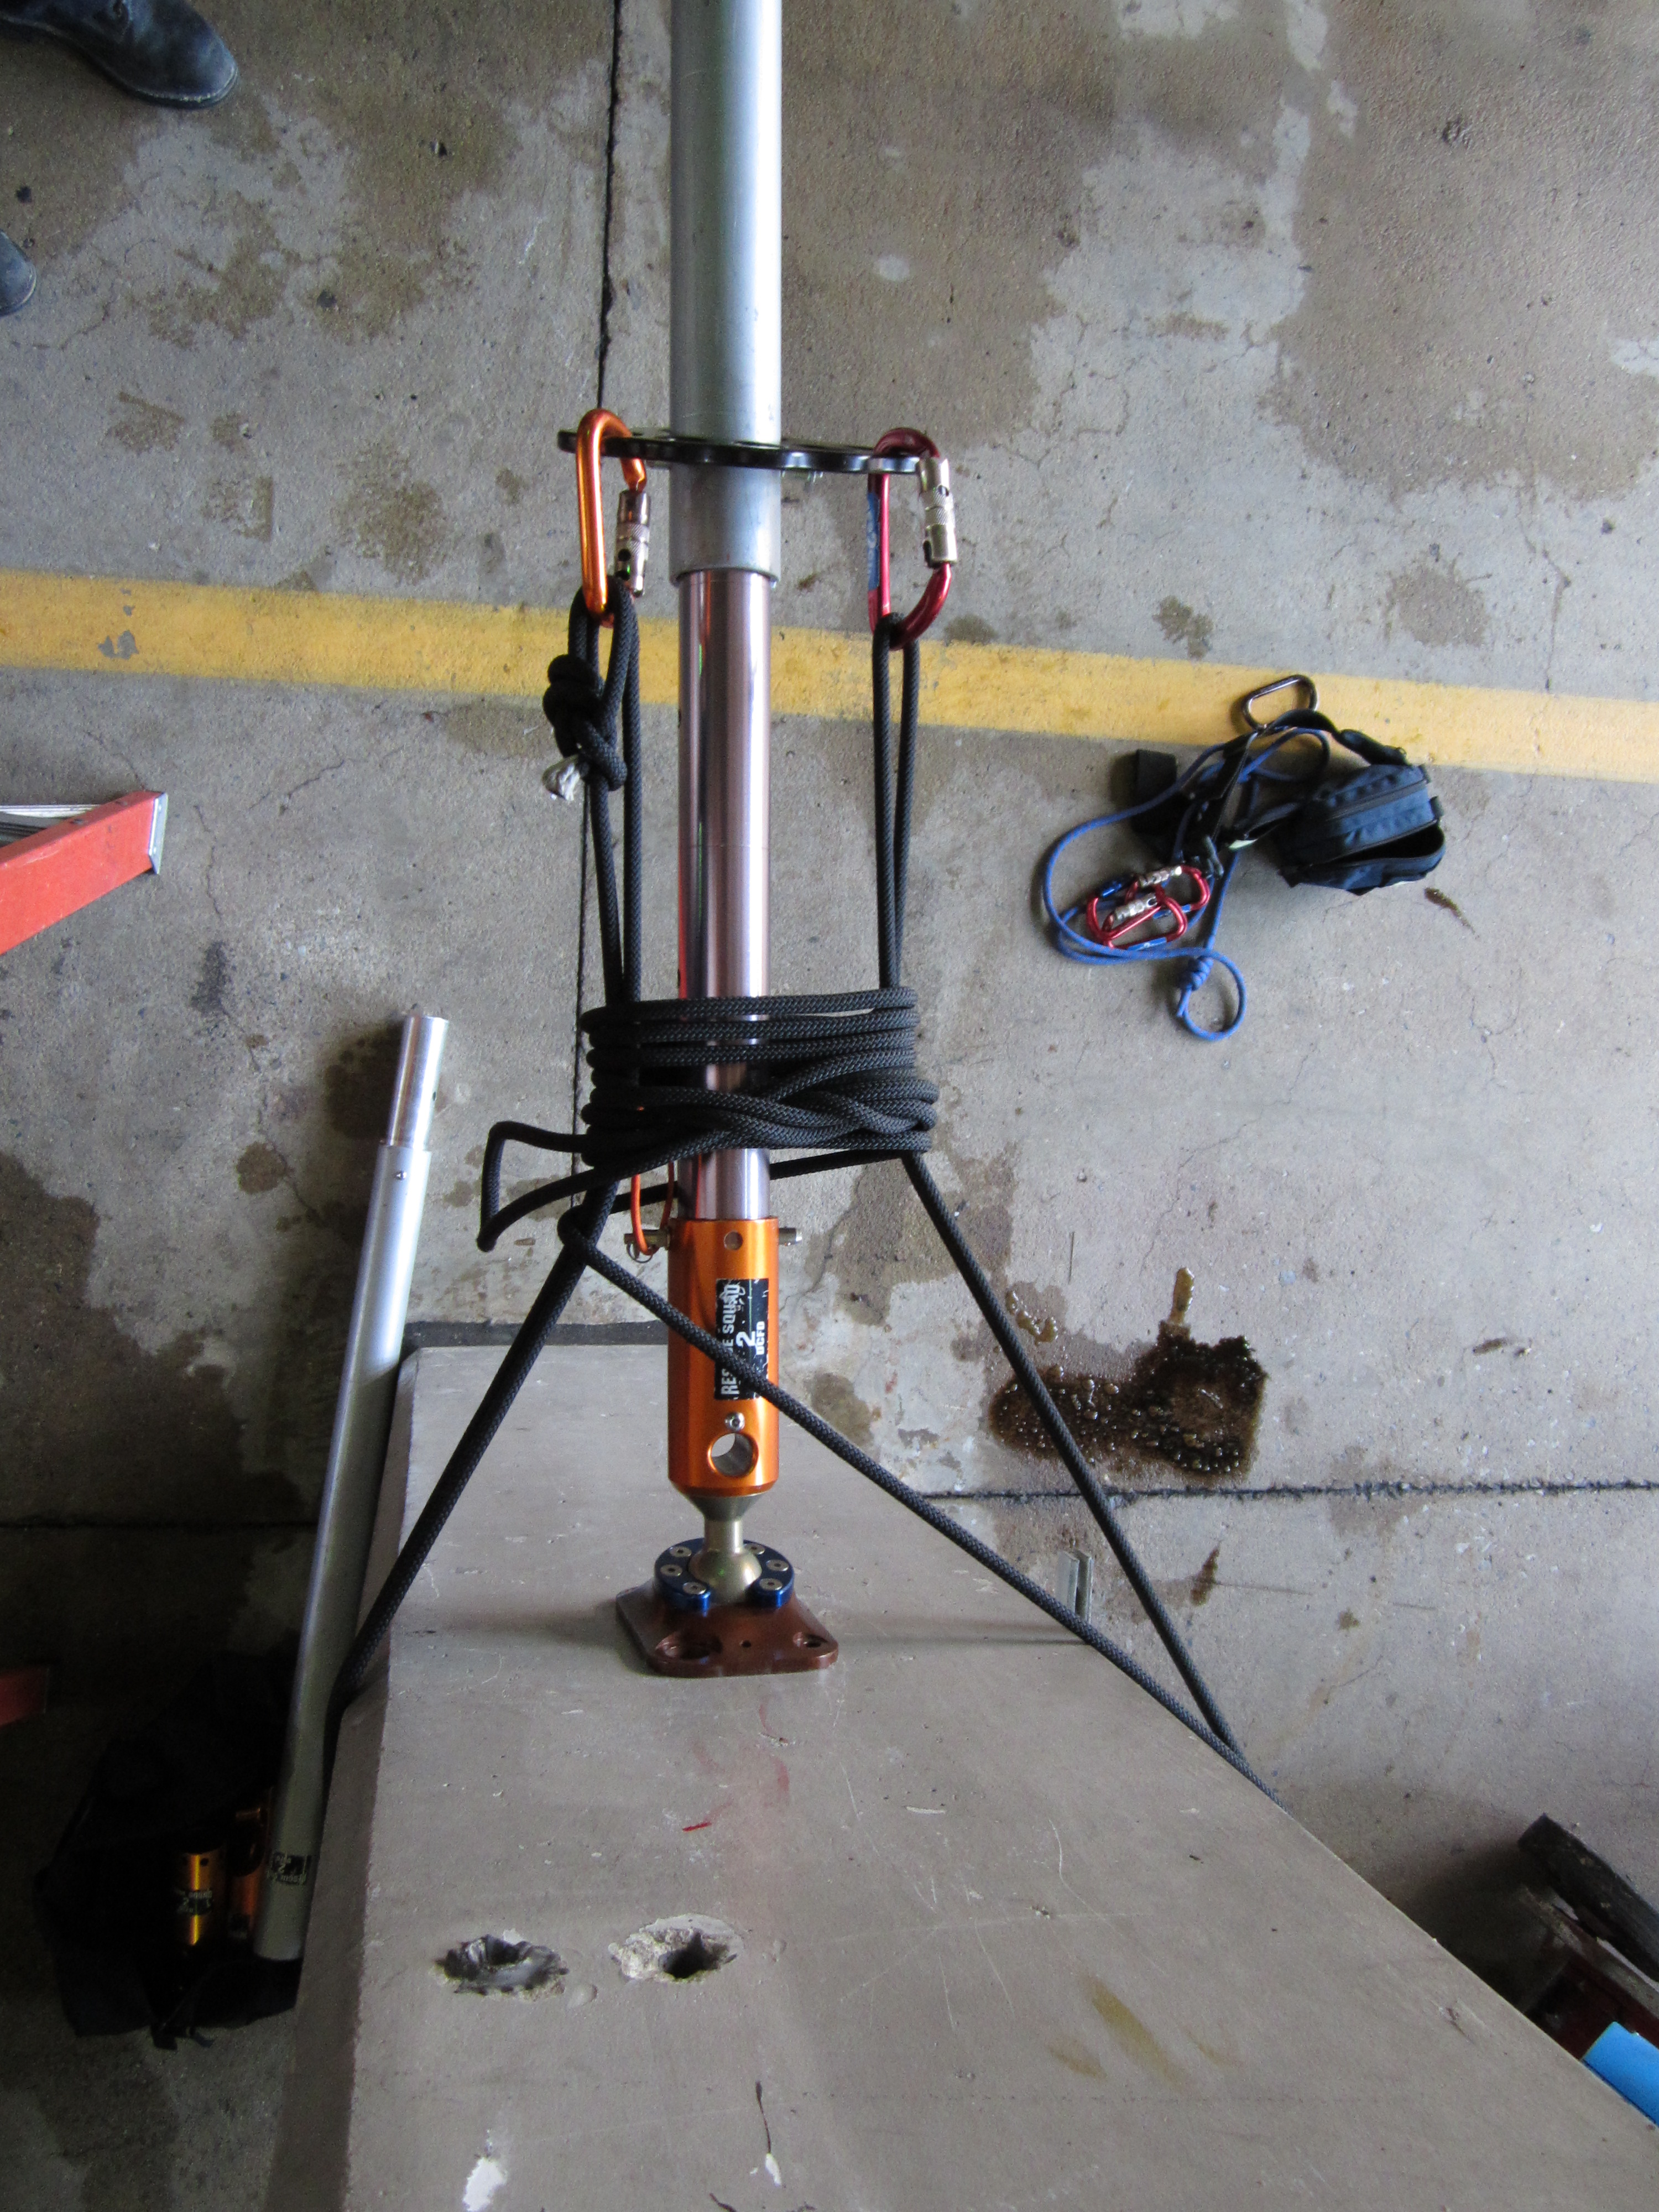
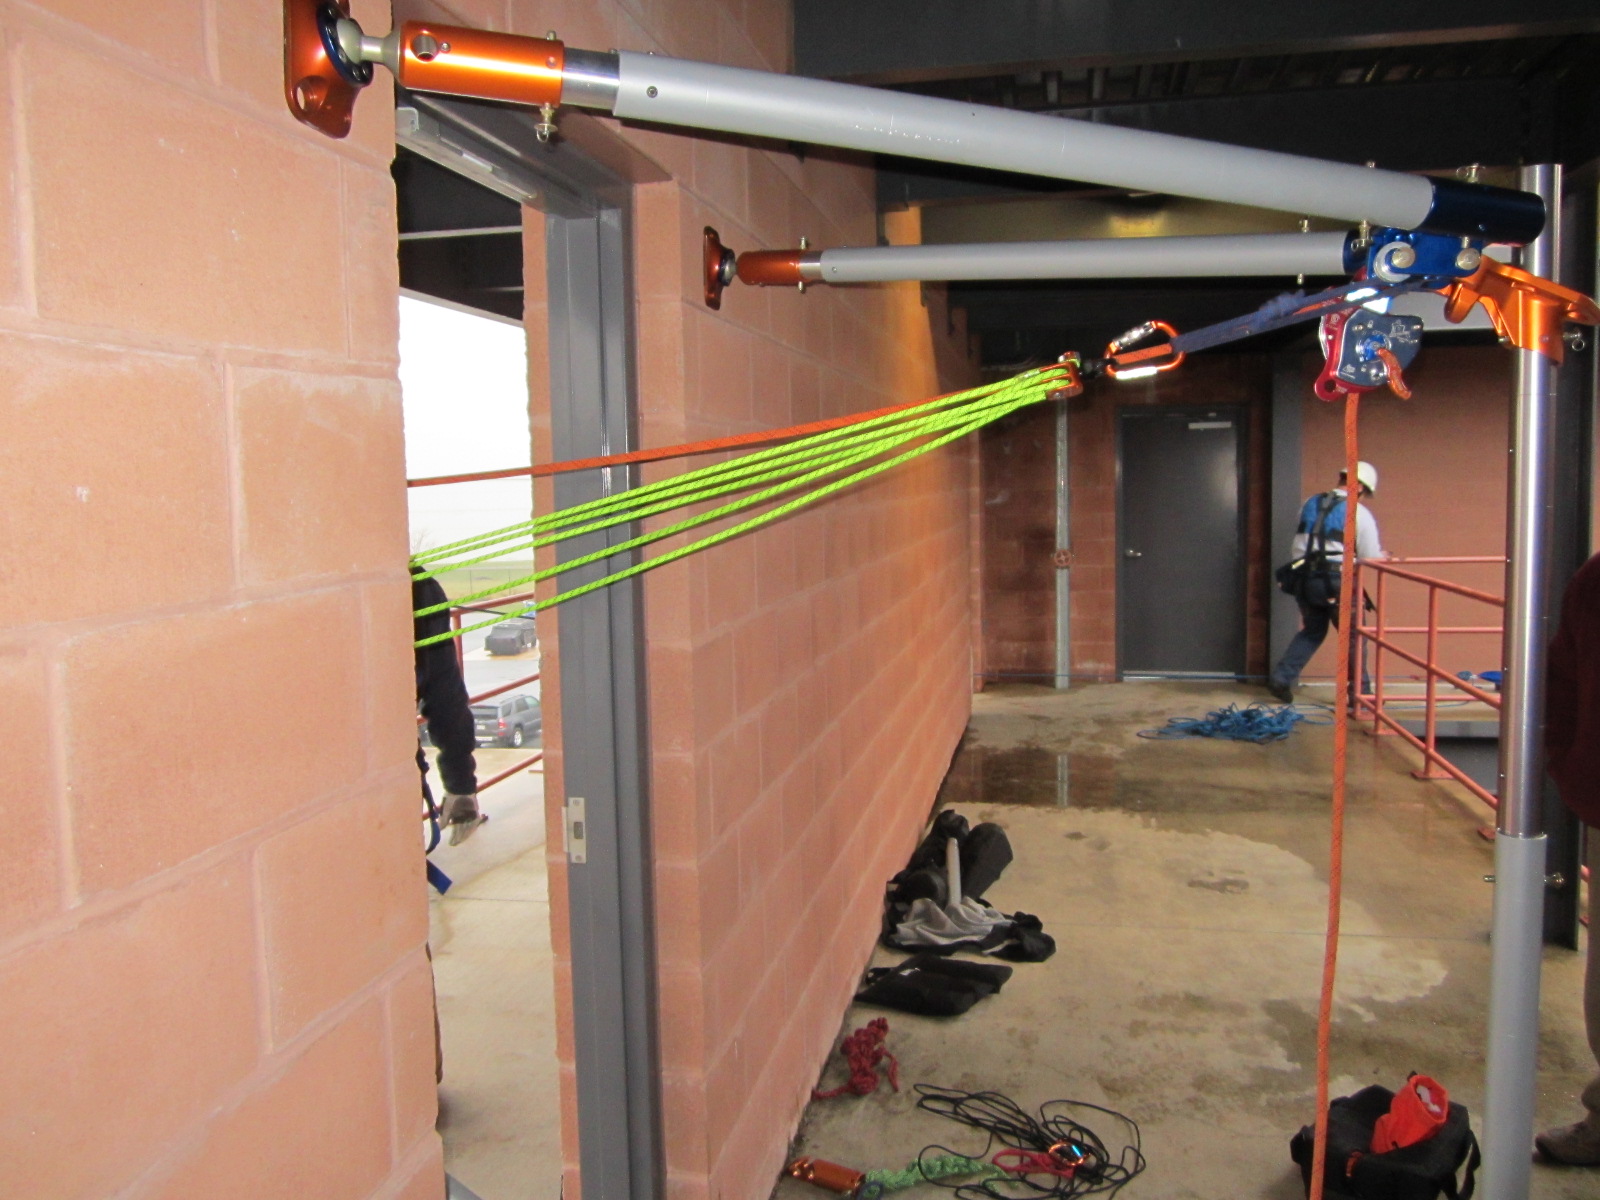
Use of the Arizona Vortex high directional in the urban environment.
The Rescue 2 Training original: The Appalachian Doortex! For urban anchoring and elevator rescue. High Directional? Anchor? Both!?… Come find out!
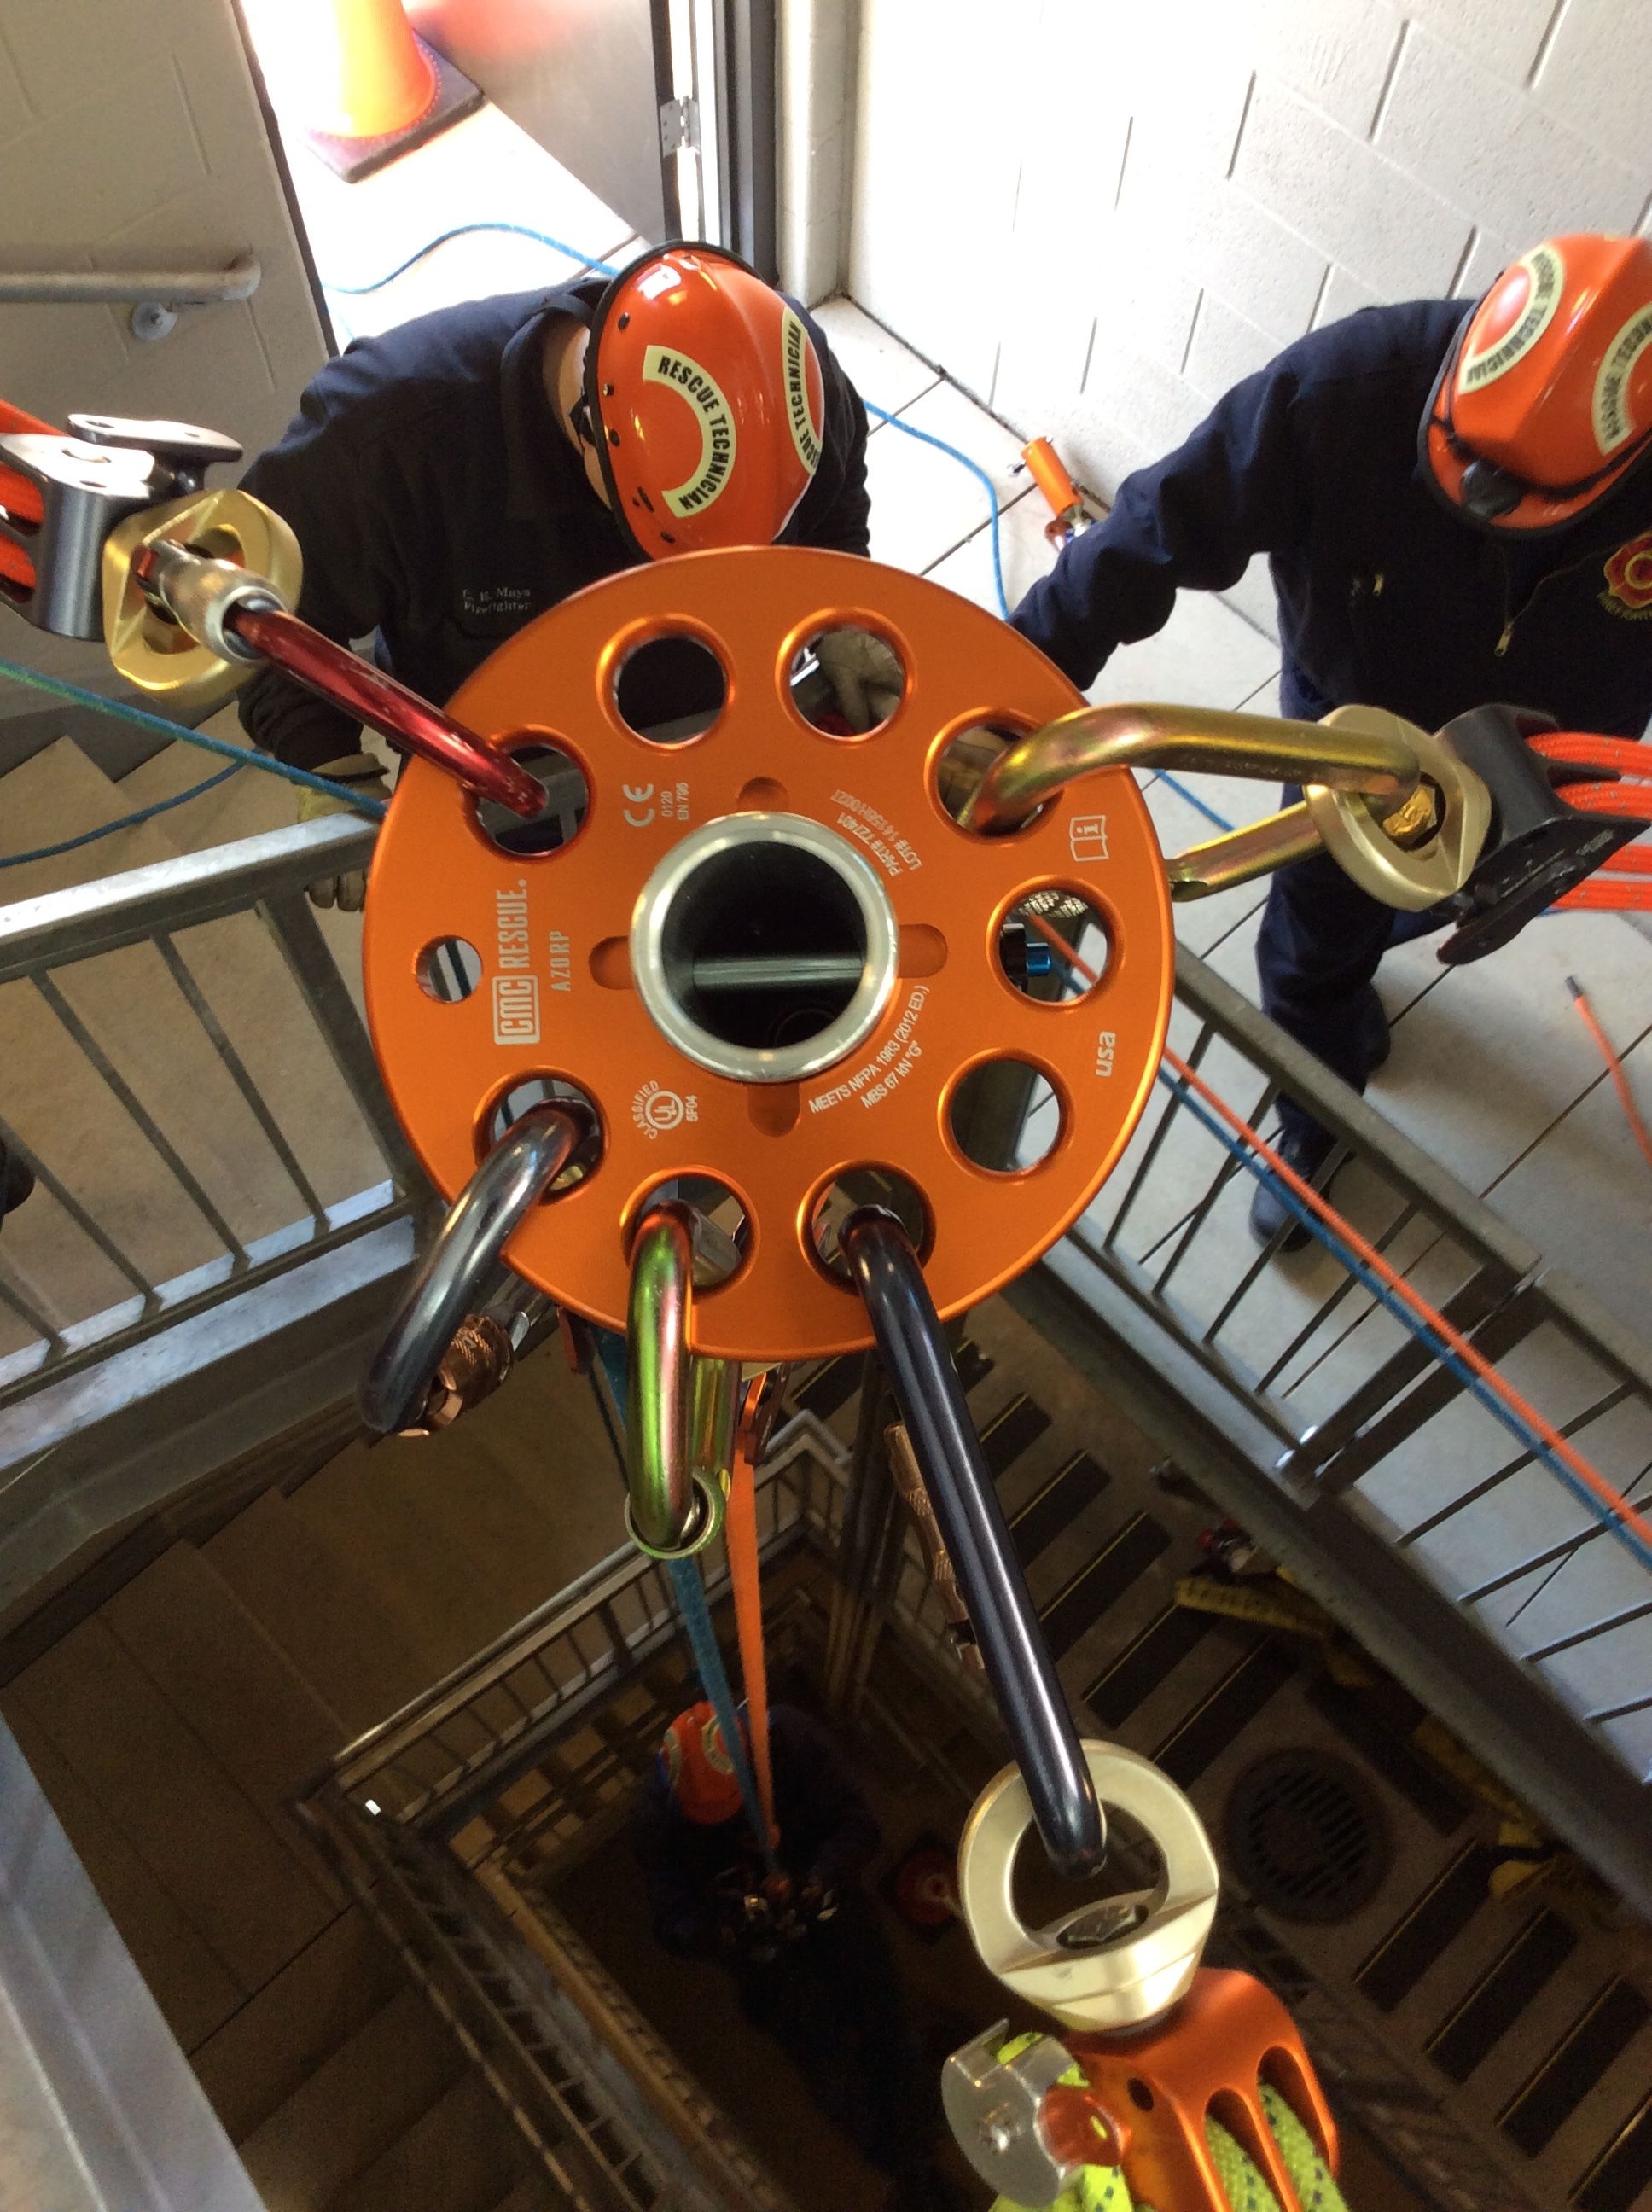
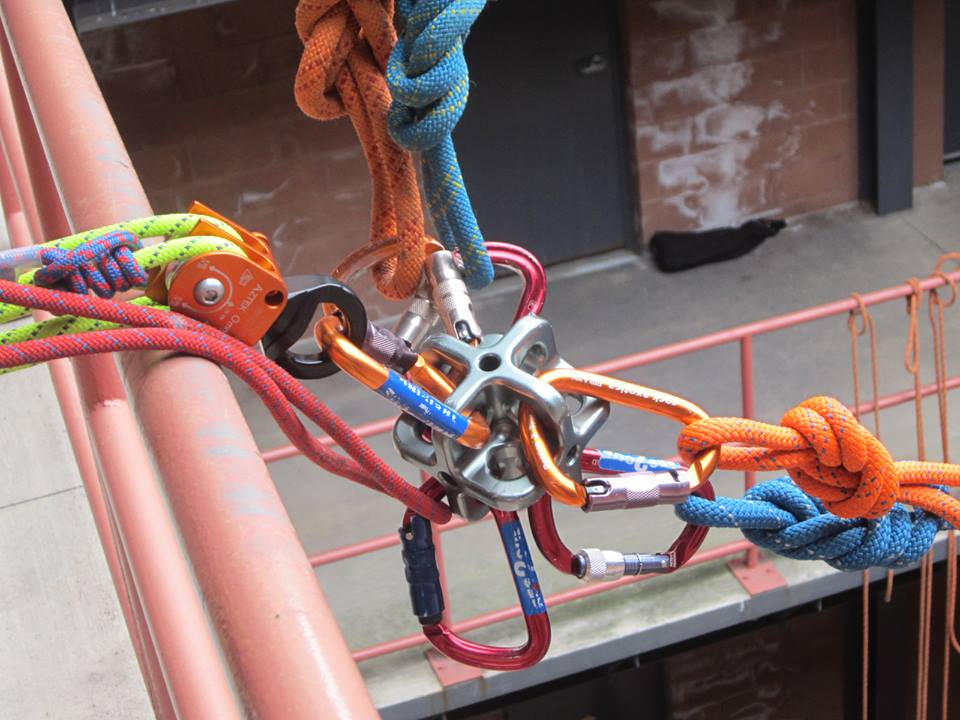
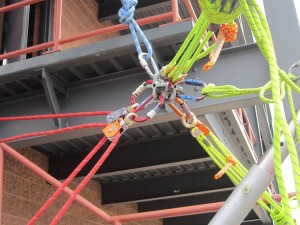
3 dimensional anchoring with the UFO.
The Skyhook capstan winch.
…And much more.
The cost of this two day, 16 hour class is $295 per person. Just bring a harness, helmet, and any ideas or equipment you would like to see used.
Please contact Kelly Byrne at 240-462-6610 or kelly@rescue2training.com with any questions.
The title of a “The Greatest Highline Ever” is being given to a group of people who probably knew very little about rope rescue as we know it and also probably wish they never had to set up this highline.
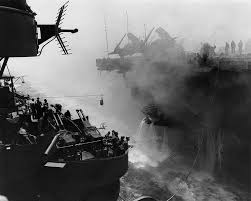
On May 11, 1945 an aircraft carrier called the USS Bunker Hill was near Okinawa, Japan supporting the invasion of Okinawa when it was struck by two kamikaze planes in quick succession. The ship was heavily damaged and the crew suffered massive casualties. 346 sailors and airmen were killed, 43 were lost at sea and never found, and 264 were wounded.
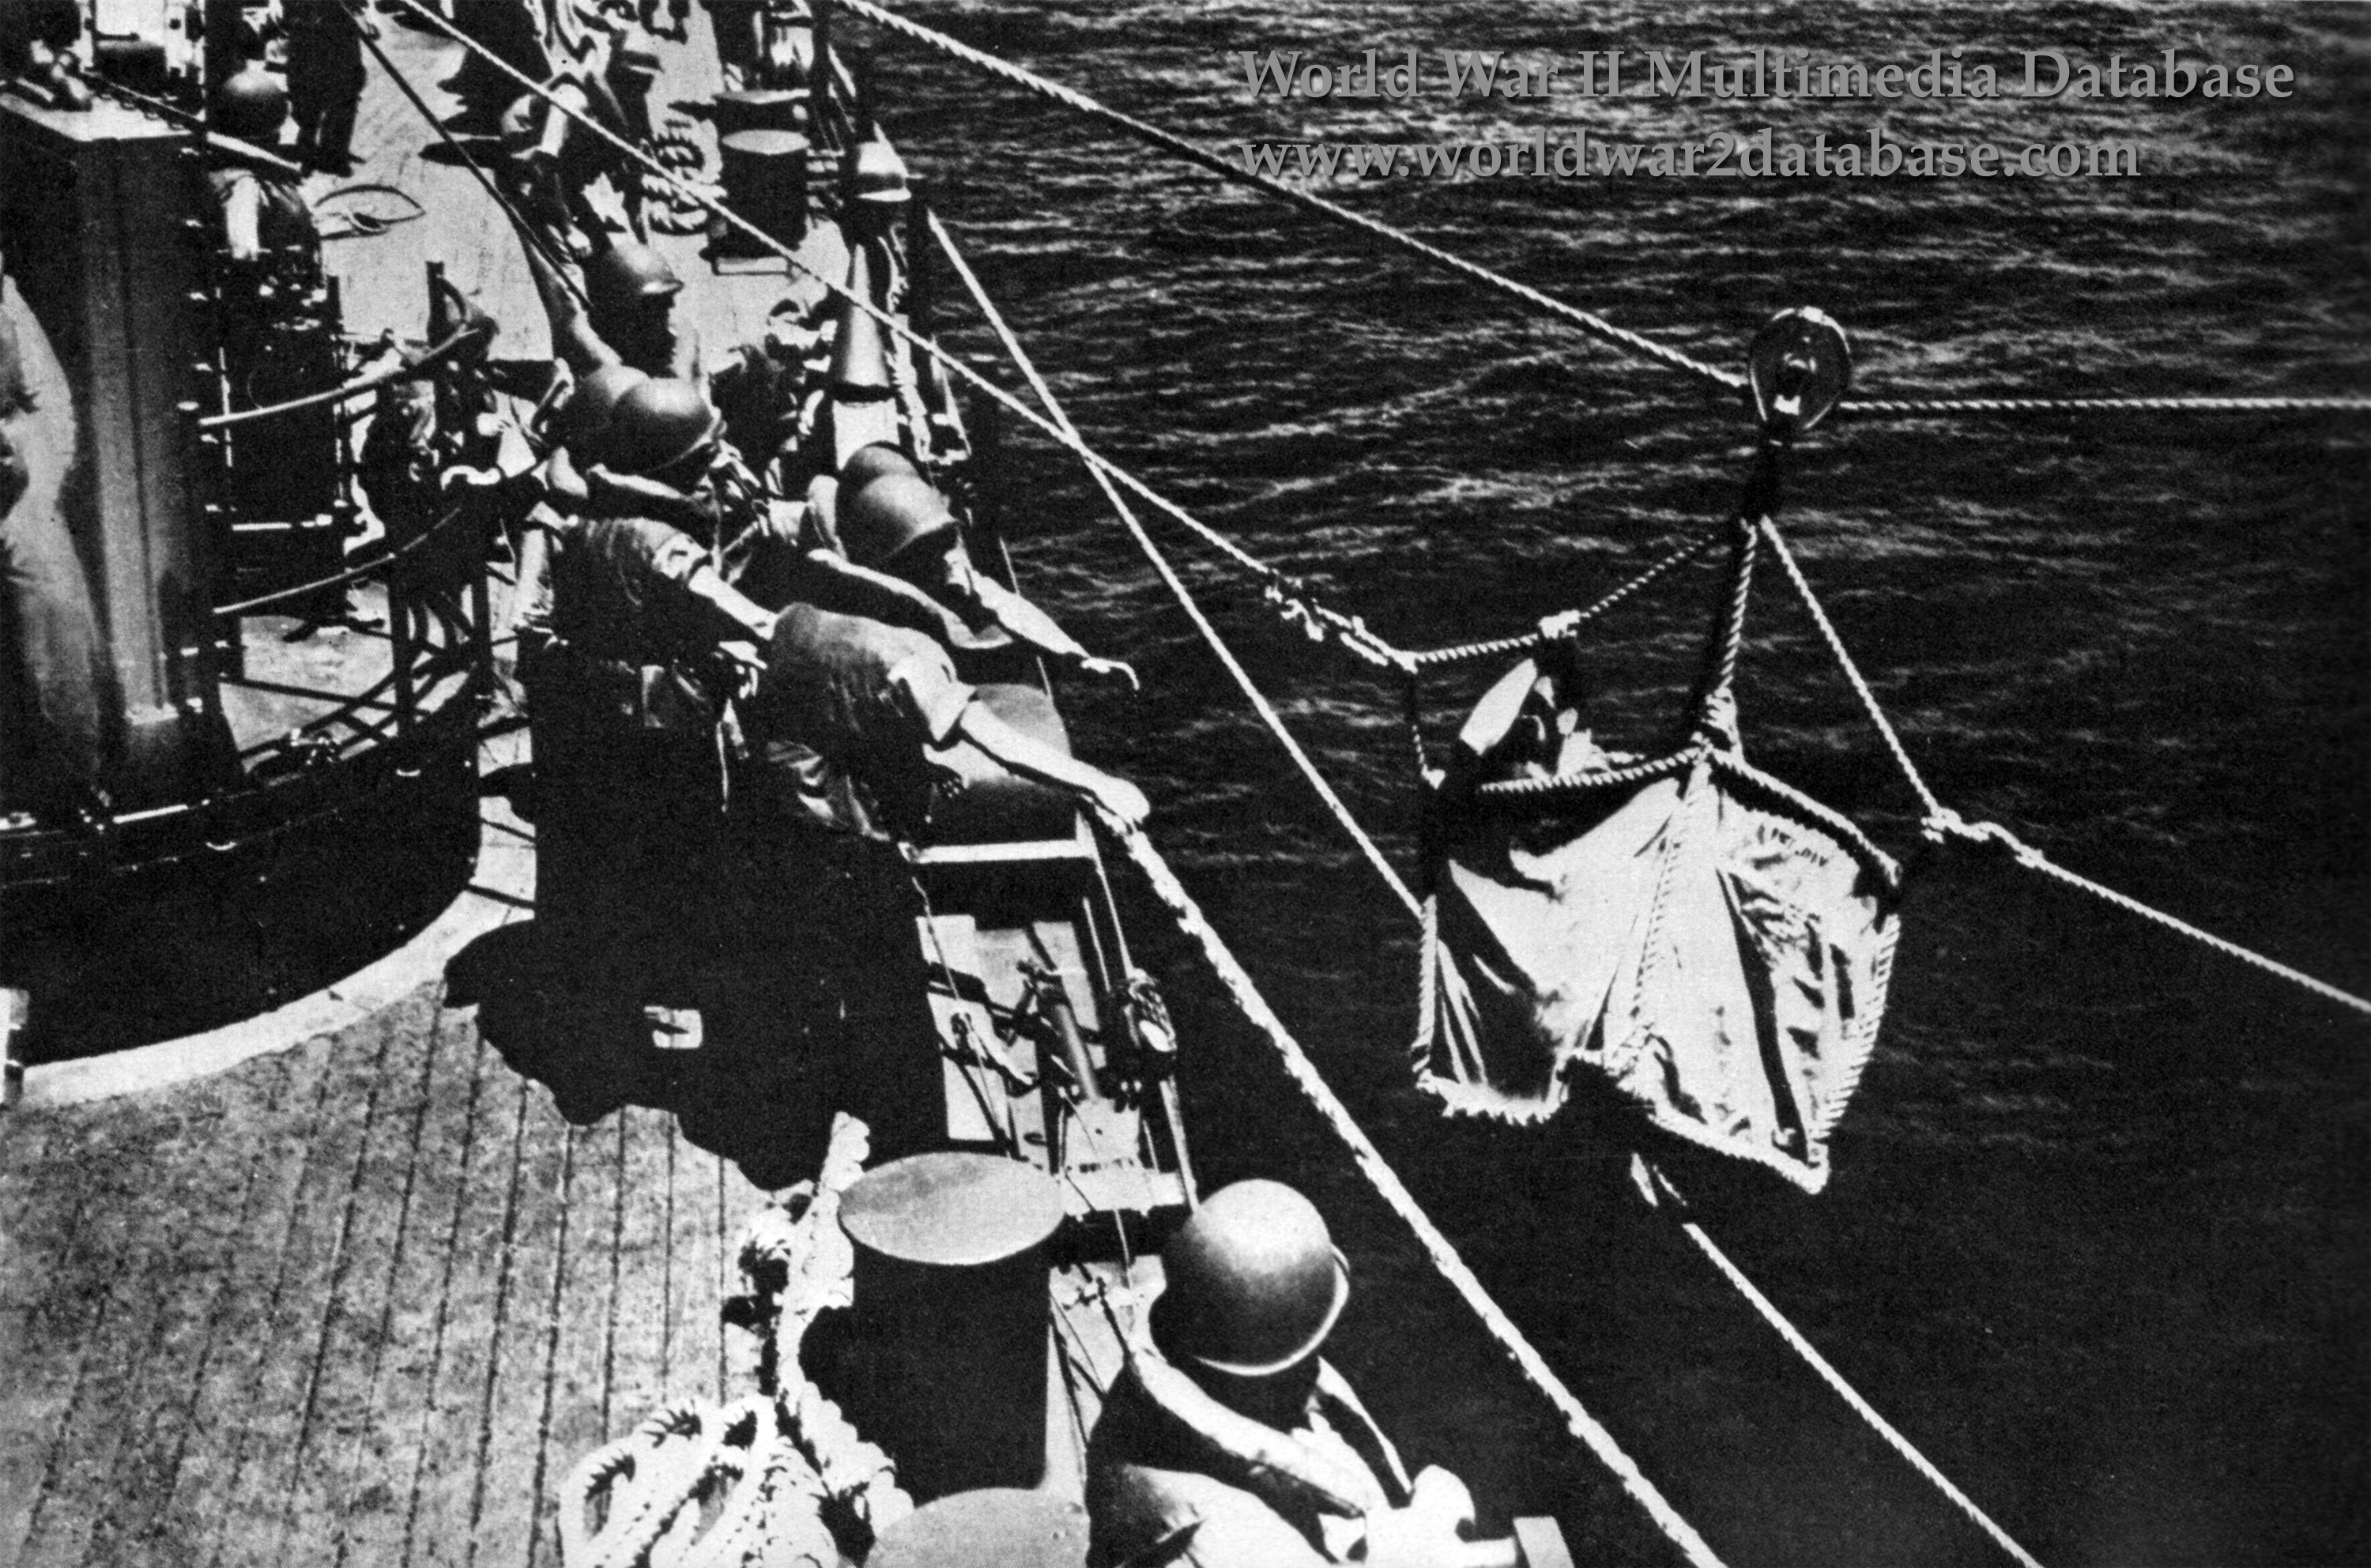
A light cruiser named the USS Wilkes Barre was one of several ships that came to the rescue. The Wilkes Barre was brought alongside Bunker Hill, with the Wilkes-Barre ’s bow placed hard against the Bunker Hill’s starboard quarter. The cruiser played 10 streams of water on the persistent fires, while 40 men, trapped astern in Bunker Hill scrambled to safety. Additionally, the injured were ferried to safety from one ship to another utilizing a highline. The title of “Greatest Highline Ever” goes to the “Greatest Generation”. Take a look at the pictures below and see if you agree. Additionally, take 3 minutes to watch the Youtube video below. There is some really compelling footage of the actual attack as well as some pretty gruesome pictures of the aftermath. Let’s not forget the sacrifice these guys made.
Learning from others’ mistakes is something we can and should do, particularly when it pertains to rescue work. The situations below are prime examples of this. Take a minute to laugh a little at their misfortune (I’m pretty sure nobody died), but then try and absorb what happened and make sure it doesn’t happen to you.
The first example of things going bad could have been solved by a couple of easy solutions like: knowing how to tie a knot, having somebody who knows how to tie a knot look over your system, use a backup line that is tied with an appropriate knot, etc… There’s a trend there somewhere.
Knowing how your system is going to react when acted upon is a REALLY good skill to have when performing rope rescue operations. See if you can figure out what is going to happen in the video below when the helicopter pulls up to lift the rescue package:
Here at Rescue 2 Training we are pretty big fans of getting our rope systems up off of the ground for the edge transition. Combine a low rope over the edge with not knowing what your rope system is going to do when you load it (as mentioned above) and you have recipe for a bad time. Here is what the finished, face smashing product (and Bad Edge Transition Hall of Fame member) looks like when you pull it out of the oven:
Take a look at the first video in the link below. It’s a news story out of Fort Wayne, IN that I assume was supposed to be a simple feel good piece highlighting the local rope rescue team. If you want to jump right to the good stuff, go to the 2:10 mark in the video. What you will see is a really big, really expensive mousetrap.
I do feel a little bit bad about Monday morning quarterbacking this video… but not enough to cause me not to do it.
First, the critical point at the Kootenay Carriage. It would appear that there are two track lines, and two upper control lines (although no lower control lines) with tails going down to the rescuer and victim. The Kootenay, however, remains a critical point. Do I think it will fail? No. But we rig for failure caused by human factors, not equipment factors. Should that Kootenay fail though, the basket could take a major and possibly fatal swing fall.
Second, there is difficulty with attempting to get the basket back up over the edge after they took a ride down and back up the track lines. The reason given in the report is that the “ropes stretched”. While I don’t doubt they stretched, take a look at the link the news story below the youtube video. The second video is extra footage they got while doing the shoot. It is obvious from watching it that they were going to have this problem. While initially loading the basket over the edge you can see how far it drops down when it is initially loaded. It’s about the same distance that they are below the edge when they come back up.
Rope stretch? Maybe. Foreseeable problem? More likely. I’m curious if the attendant could have stood on the end of the basket in order to raise the head up and over the edge. Also a factor is the excessively tall bridle they use. Judging by the video, I’m guessing from the bottom of the basket to the top of the carriage to be six feet in height.
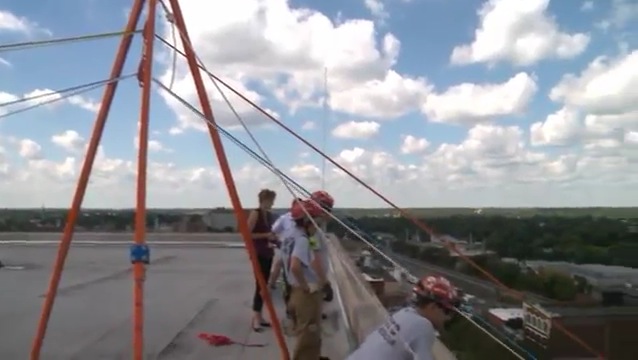
Third, you can see from this picture just how close the resultant is to being outside of the footprint of the tripod. When the track lines were tensioned to raise the load, I’m curious if the friction in the pulleys caused them to temporarily move the resultant until they found their center again.
Fourth, two statements made during this gave me a bit of heartburn. The first is that the “white rope didn’t work the way it was supposed to.” Ropes work exactly as they are rigged. Unless it broke under tension due to unseeable chemical degradation, it was rigging failure. It’s hard to tell what the white lines were rigged to, but I’m guessing they got pulled up off of whatever they were on. The second statement is that “nobody was dropped…they were lowered”. If it was unexpected and uncontrolled, it was a drop. Maybe I would have been inclined to say the same thing out of embarrassment while on camera, but lets call it what it is.
Last, neither the reporter in the basket, nor the one on the roof seen just before the tripod topples, have a helmet on. If I were running this show, it probably would have been an afterthought for me too. Having seen this video, I’d be willing to bet it would be a fatal blow if a tripod toppling like that hits you in the head, helmet or not.
I do applaud Ft. Wayne TRT for allowing this to air (if in fact they had a choice). It’s sometimes hard to admit a goof up. It’s even harder to have it on tape for guys to critique from a distance without knowing the full circumstances (me). The least we can do is try to learn from it.
Here are two great videos from DRR Rescue posted on youtube that show how to construct a 1-1-1 picket system, which is three pickets placed in a row.
Two things stood out to me in these videos. First, I really like the system they used to tie the pickets together. I’ve seen a few different variations on the technique, most involving some sort of windlass to tighten the webbing. Doing that requires more hardware, as well as driving in another piece of rebar. The videos show what amounts to a non working 3:1 with webbing.
The second thing that really stood out was how much force this system was able to hold. They put over 6ooo lbs of force on the system. While the picket did flex a little bit, it did not noticeably pull forward in the ground. I’m anxious to try this in the rain soaked, clay dirt around my house!
Thanks again to DRR for sharing these with the world. Be sure to check out the tutorial section on the website as well as their field guide, that thing is full of great, easy to apply info. http://www.desertrescue.com
There is a lot to be said for how far technology has allowed us to go in the world of ropes as it relates to safety: Stronger yet smaller ropes, lightweight high strength aluminum hardware, etc… But is fun to cast our thoughts back to where the rope rescue world has ascended (that’s a pun) from. Check out the rescue drama in the youtube video below. It is from 1949 and was posted by Ron Holan on the Rope Access Technicians Network group on Facebook.
The neat part about this for me was that they didn’t use any carbiners or friction devices to lower the casualty. It was all done with friction wraps around their bodies and around rock outcrops. While this might not be how a rescue should be done now, given all of our available equipment, it is none the less a look at how a rescue can be done without any equipment.
Maybe you could use this video as an idea for a drill: Only use a Stokes basket and a rope, no hardware, to accomplish lowering a package down a building, catwalk, mountain, etc… Oh, and they weren’t using Prusiks either. They only had trust in each other!
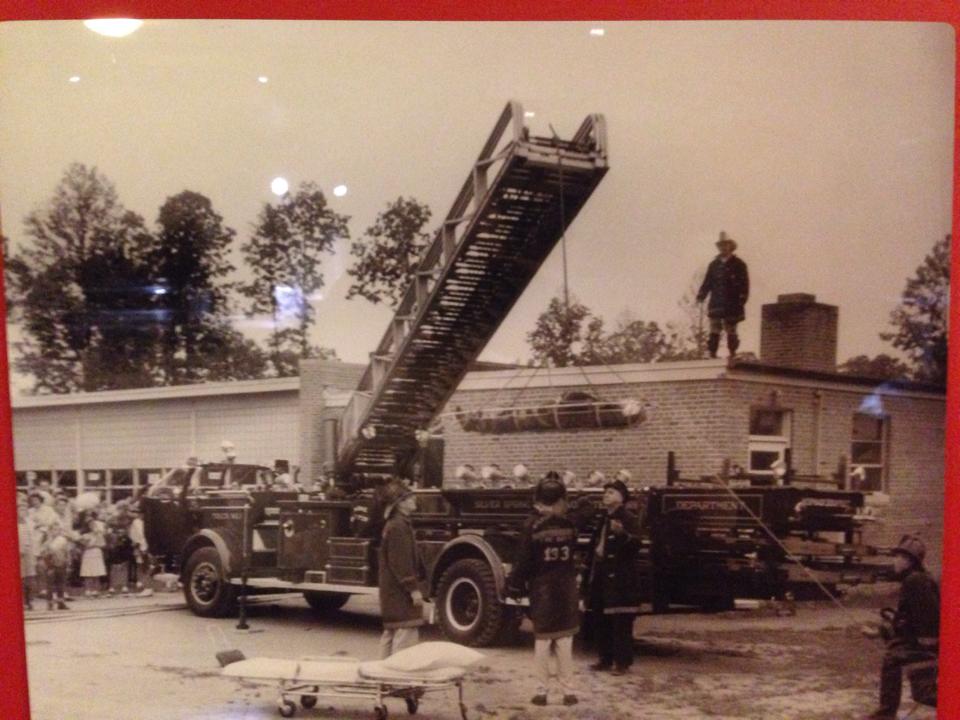
Also pretty darn old school is this picture of Silver Spring VFD using the ladder truck for a high directional to get a Stokes basket off of the roof of a one story school and down to the ground. Thanks to our Florida friend Joe Schulman for findiong and sharing this one.
It’s hard to tell for sure from the picture, but it looks like the rope is just hard tied to the tip and the ladder is just craning the load. Similar to one of our previous posts HERE , it’s also another example of how it might be easy to access a patient via ladder and use a rope system to get them down.
We have just added an Open Enrollment Class for our Modern Technologies in Rope Rescue workshop on May 17 and 18 in Lancaster, PA.This class covers a lot of ground in two days. We will discuss and use the AZTEK in many of its essential uses. We’ll also be using the Two Tension Rope System concept with the CMC MPD. Additionally, we’ll be using the Arizona Vortex in some of its traditional configurations as well as the Rescue 2 Training original: the “Appalachian Doortex” configuration for urban anchoring and elevator rescue.
Come out and try the newest equipment and techniques in rope rescue. Cost of the class is $295.
Email Kelly M Byrne at kelly@rescue2training.com or call 240-462-6610 for more information.
Search
Rescue 2 Training Mailing List
Sign up here for our mailing list and receive priority notice of forthcoming training opportunities and other cool stuff.